Mobile Number Portability from October 31


India's telecom regulator said today that mobile number portability (MNP) will be implemented nationwide from October 31, as announced earlier, ruling out any further delay.

MNP is a service that allows a mobile user to change his operator while retaining the number.


"There will be no further delay in the implementation of MNP," Telecom Regulatory Authority of India (TRAI) ChairmanJ S Sarma said.


The Department of Telecom (DoT) said the operators must ensure that all inter-operator tests for porting the numbers from one service provider to another are completed before September 1, 2010.


The Dot made it clear to all telecom operators that in case they fail to implement MNP as per the scheduled deadline, they will be barred from launching any new commercial services from September 1.


"It has been decided that permission to launch commercial service in any area with effect from September 1, 2010 shall be given to only those licensee(s) who are MNP compliant," said a DoT note.


Mobile service providers -- Bharti Airtel, Reliance, Vodafone Essar, Tata Tele, Idea, STel and Aircel -- are getting ready to launch high-speed 3G services from next month.


State-owned telcos Bharat Sanchar Nagar Nigam and Mahanagar Telephone Nigam Limited have said they are ready with the infrastructure to implement the MNP service.


The earlier June 30 deadline for the implementation of MNP was deferred as the operators were not ready with the infrastructure to provide the service.


The MNP was to be implemented by December 31, 2009 in all the metro cities as well as in the states of Maharashtra,
Gujarat, Andhra Pradesh, Karnataka and Tamil Nadu. The deadline was then changed to March 31, 2010 and thereafter to June 30, 2010.


Asked about the rolling out of 3G services, Sarma said, "I see no reason to believe that there would be any delay."

Ayodhya verdict on Thursday, Sensitive Areas in Bengaluru

 Dear All,
As you may be aware the Allahabad High court on the Ram Janma Bhoomi – Babri Masjid dispute is expected on September 30, 2010. The judgment is likely to be pronounced in the afternoon. Depending on the nature of judgment, different reactions are expected from various communities across the country.
Government has made all necessary arrangements for ensuring law and order especially in sensitive areas across the country. Prohibitory orders have been issued by the police prohibiting all kinds of processions, rallies, without police permission.
Offices will remain open and it will be business as usual. Based on the advice of the law enforcement agencies, we have no reason to believe that but it will be impacted on Transport operation.   Friday, Sept30, 2010, 1:00 PM till Saturday 8:00 AM (Sept 31,2010) is considered sensitive.

 
Sensitive Areas in Bengaluru 
South Zone  
Gori Palya, Nayandalli,Pantharpalya,Azad Nagar, Yarab Nagar, Ilyaas Nagar South End Circle Siddapura(Jayanagar), Tilak Nagar,  
North Zone  
Tannery Road,  Lingaraj Puram, Nagvara, Cox Town,  Coles Road, JC Nagar, Hebbal,  RT Nagar, Sultanpalya,Ulsoor  
Central Zone    
KR Market/Kalasipalya, Majestic,  Vidhana Soudha,  Shivaji Nagar & vicinity, MG Road, Brigade Road,
West Zone  
Yeshwantpur, Vivek Nagar,  Anepalya  
East Zone
 KR Puram Bridge
   

Procedure to install sata hard disk to pc


Step 1: Back up and scout around

First, back up your critical files (don't forget your Outlook .PST archive) to optical discs, an external drive, or online storage. Then check whether a CD comes with the drive, providing drive-specific information and general upgrade assistance. It may also later help you copy the contents of one drive to another. Install this software first. Then, power down your PC, unplug all cables, and open the case. Next, ground yourself by touching a metal portion of the chassis.

Look inside—your first task is to determine where your new drive will go. Bays for internal drives are usually located below the wider, front-accessible bays that house CD or DVD drives. If you plan to replace your boot drive with the new drive and don't have an empty bay, your upgrade will involve more steps than we can cover here. But if you're replacing your boot drive and you have an empty bay, follow our steps for adding a second drive. After formatting it, use Norton Ghost (or a similar program) to clone your boot drive's contents to the new drive. Then, revisit steps 3 and 4 to direct your PC to boot from the new drive.

We'll be installing a SATA drive, but the process is similar for the other common drive type, IDE. SATA drives use a thin, seven-pin data cable; IDE drives use a 40-pin ribbon cable that's usually gray. If you're unsure which drive type your PC already has, check its documentation or label. Most PCs more than a year or two old employ IDE hard and optical drives, and don't support SATA unless they have a SATA PCI card installed. More-recent desktops may use (or just support) SATA drives but should support IDE, too.
Tip: If you transfer Windows XP from one drive to another, you may have to reauthorize Windows.


Step 2: Examine data and power connections 
Tracing along the SATA cable of an installed drive will lead you to the SATA connectors on your PC's motherboard.


Most hard drive kits include a data cable (SATA or IDE, depending on the drive), a power adapter cable (with some SATA drives), and screws. If yours doesn't include cables, you can purchase them separately.

First, the data connection. If you're installing a SATA drive as secondary storage, follow the data cable from your current drive (assuming it's SATA, too) to the other end. See if an unused SATA port lies nearby on the motherboard or an interface card. If you can't find one, consult your PC's documentation.

If you're adding an IDE drive as a second drive, you may be able to connect it to the same data cable as your primary IDE drive, or along with an IDE optical drive. Look for a third, free connector in the middle of the cable that connects your currently installed IDE drive to the motherboard. Note that some older PCs use 40-conductor IDE cables, not the 80-conductor ones current drives require. (Compare your kit cable to the one installed—the 80-conductor variety has much thinner wires.) 80-conductor cables are backward-compatible (both types use the same 40-pin connector), so you can swap out a 40-conductor cable for your kit's 80 if need be. (The "master" drive goes at the end—see step 3.) 
Once you've located an empty bay for your drive, make sure the relevant data (left) and power (right) cables will reach.


Next, consider the power connection. Our SATA drive has a 15-pin SATA power connector. If you already have a SATA drive installed, follow its power cable (the wider of the two connectors) to see if an unused power-supply lead with the same connector is nearby. If so, earmark that lead for your new drive. If it can't reach the empty bay, see if any bundled adapters help.

Some SATA drives also support familiar legacy Molex four-pin power connectors—you can use a Molex or SATA connector. If so, hunt for a free Molex-style lead. Still no match? Then you'll need an adapter, such as a Molex-to-SATA adapter (some kits bundle one), or a Y-adapter that splits a lead in two.

IDE drives are simpler: They always use Molex connectors. You just need a free Molex-style lead (or a Y-splitter).


Step 3: Mount and connect the drive 
The SATA data connector is keyed so you can't install it upside-down.


When installing SATA drives, jumper settings usually aren't an issue. That's not true of IDE, where a jumper indicates whether a drive is a primary ("master") or secondary ("slave") drive. Check its documentation for the proper setting. If your PC has only one IDE hard drive, it's probably set to "master." Assuming you chain another IDE drive off its cable, the new drive should be set to "slave." (You'll later have to change the jumper to "master"—and attach the drive to the cable's end—if you remove the original boot drive and make the new drive the boot drive.) Another option: Set both IDE drives on an 80-conductor cable to the Cable Select (CSEL) jumper setting. The PC will determine master/slave status according to the drives' placement on the cable ("master" at the end, "slave" in the middle).

Next, look at your current hard drive to see if mounting rails are attached to its sides. If so, screw a set onto the new drive (look inside the case for spares), then slide the drive into its bay. Otherwise, screw it directly into the bay. Four screws are sufficient. Usually, the label side points up; mimic the boot drive.

Attach one end of the SATA data cable (which is keyed for correct insertion) to a SATA port on the motherboard or interface card, the other to the drive. IDE data cables, also keyed, usually have a red stripe that lines up with the "pin 1" marking on the drive.

Next, plug the power-supply lead (keyed, too) that you scouted out in step 2 into the drive, including any necessary extender or adapter. Then close the case.


Step 4: Configure the BIOS

Next, boot into your PC's BIOS-setup utility to verify that it recognizes the new drive and positions it correctly in the drive hierarchy. (Check your PC's startup screen to determine which key launches the utility.) Once there, also check that "auto-detect" is selected for the drives, if an option. If the utility lets you select the boot order, give your intended boot drive priority over any other hard drive. This information may be under Boot Options, Boot Order, or Boot Sequence.

Save changes and exit the utility. Your PC will reboot.
Tip: Using a SATA PCI interface card? It may have its own BIOS to check.


Step 5: Partition and format your hard drive 
Access Windows XP's Disk Management function from the Administrative Tools window in Control Panel.


Our PC runs Windows XP, which lets you partition and format drives within Windows. Older Windows versions, such as 98 and Me, make you do this from DOS.

With XP and 2000, though, use Windows' Disk Management utility. Click Start > Control Panel > Administrative Tools > Computer Management, and choose Disk Management from the tree at left. Your new drive should appear, with a black bar indicating it isn't partitioned. Right-click the bar, and choose New Partition to launch the New Partition wizard. 
Installed drives and their partition schemes appear in the Disk Management window's lower-right corner.


Click Next, and check that Primary Partition is selected; click Next again, to the Specify Partition Size screen (don't change the partition size in the "Partition size in MB" field); and click Next to advance to another screen, on which "Assign the following drive letter" should be selected. Click Next yet again (to the Format Partition screen), and ensure that "Format this partition with the following settings" is selected and that the "File system" drop-down reads "NTFS." Click Next a final time, hit Finish, and formatting begins.

Formatting could take an hour or more, depending on drive capacity. But don't be surprised if your formatted drive has less capacity than the package claims. A 320GB drive, for instance, formats to about 300GB. Drive manufacturers advertise preformatted size, but a portion of the drive is inaccessible.

Beware of paper cups


 Varun*, an IT professional working in Technopark, was finding himself with an upset stomach every night. While normal medical checks revealed nothing wrong in him, deeper probes revealed the reason – his stomach was collecting significant amounts of wax. And doctors identified the villian – the ordinary paper cups he used for drinking his tea at his office pantry.
Disposable paper cups have become quite popular in office pantries due to the convenience it offers. What many overlook is the fact that these paper cups are coated with a tiny layer of wax, which is essential to prevent water from seeping  into the paper. When very hot liquids are pour over this cup, the wax may disintegrate and a little may come off, which will promptly be sent along with the drink into our stomachs! While our body can discard minor amounts, over the long-term, it does become a problem.
So what can be done about it? You can try to bring your own glass cups. Glass is one of the least reactive materials in the world (remember acids are stored in glass vessels, blood samples are collected in glass plates – these are for a good reason). But glass does have the problem of breaking easily, so it requires good care. Ceramic cups are probably the best bet. Of course, you can also use your ordinary stainless steel glass, but never use plastic ones – its dangers are even worse than wax! 

Pinch zooming for any Windows Mobile device with a resistive screen

 If pinch zooming was the one thing you’ve missed on your Windows Mobile smartphone you shouldn’t worry on that anymore. The resistive screen of your smartphone will not bug you anymore. A third-party developer has found a solution allowing you to pinch zoom on any WinMo device in the most suitable apps such as web browser, gallery, maps, etc.
main Pinch zooming solved for any Windows Mobile device with a resistive screen
After months of hard work OndraSter – a developer from the XDA Developers forum – managed to enable pinch zooming and it works on any Windows Mobile device with a resistive screen.
The magic is simple – you download the app and it will start running in the background waiting to intercept the pinch gesture.
There is only one flaw – due to the resistive nature of the screen, one of your fingers should stay still, while the other moves.

MANTRI KPL CUP 2010 schedule

MANTRI KPL CUP 2010
Schedule of the Karnataka Premier League Matches
Date
Time
Teams
16.9.10
02.30 P.M
Belagavi Panthers vs Malnad Gladiators
16.9.10
08:00 P.M
Provident Bangalore(Rural) vs Bijapur Bulls
17.9.10
02.45 P.M
Shamanur Davangere Diamonds vs Malnad Gladiators
17.9.10
06:30 P.M
Mangalore United vs Mysore Maharaajas
18.9.10
02:45 P.M
Provident Bangalore( Rural) vs Shamanur Davangere Diamonds
18.9.10
06:30 P.M
Bangalore Brigadiers (Urban) vs Belagavi Panthers
19.9.10
11:00 A.M
Mysore Maharaajas vs Malnad Gladiators
19.9.10
02:45 P.M
Bijapur Bulls vs Mangalore United
19.9.10
06:30 P.M
Provident Bangalore(Rural) vs Bangalore Brigadiers (Urban)
20.9.10
02.45 P.M
Bijapur Bulls vs Belagavi Panthers
20.9.10
06:30 P.M
Mangalore United vs Shamanur Davangere Diamonds
21.9.10
02:45 P.M
Bangalore Brigadiers (Urban) vs Mysore Maharaajas
21.9.10
06:30 P.M
Bijapur Bulls vs Malnad Gladiators
22.9.10
11.00 A.M
Provident Bangalore(Rural) vs Mangalore United
22.9.10
02:30 P.M
Belagavi Panthers vs Shamanur Davangere Diamonds
23.9.10
09:30 AM
Mangalore United vs Malnad Gladiators
23.9.10
01:30 P.M
Bijapur Bulls vs Mysore Maharaajas
24.9.10
09:30 A.M
Bangalore Brigadiers(Urban) vs Shamanur Davangere Diamonds
24.9.10
01:30 P.M
Provident Bangalore(Rural) vs Malnad Gladiators
25.9.10
09:30 A.M
Belagavi Panthers vs Mysore Maharaajas
25.9.10
01:30 P.M
Bangalore Brigadiers(Urban) vs Mangalore United
26.9.10
09:30 A.M
Provident Bangalore(Rural) vs Mysore Maharaajas
26.9.10
01:30 P.M
Bijapur Bulls vs Shamanur Davangere Diamonds
27.9.10
09:30 A.M
Malnad Gladiators vs Bangalore Brigadiers (Urban)
27.9.10
01:30 P.M
Belagavi Panthers vs Mangalore United
28.9.10
11.00 A.M
Mysore Maharaajas vs Shamanur Davangere Diamonds
28.9.10
02:45 P.M
Bijapur Bulls vs Bangalore Brigadiers (Urban)
28.9.10
06.30 P.M
Provident Bangalore (Rural) vs Belagavi Panthers
SEMIFINALS
29.9.10
02.45 P.M
TOP 1 vs TOP 4
29.9.10
06:30 P.M
TOP 2 vs TOP 3
FINALS
30.9.10
10:00 A.M
WINNER OF S/F-1 vs 2

how to create a server side trace with sql profile

1.Open up SQL Server Profiler and create a new trace. To open Profiler you can either launch it from within SSMS (SQL Server Management Studio) by going to the Tools menu and selecting SQL Server Profiler. The other way to launch it is by clicking on Start button, going to Programs, Microsoft SQL Server 2008 (or 2005), Performance Tools and you should see the shortcut for Profiler there.

2. Check your save to options. Since this will be running on the server itself you’ll have to make a decision here. If you save to table try to save to a table local to the server, preferably into a separate database/table you create for this purpose. You can create a separate database for this purpose and either keep the database for reporting purposes or drop it when you’re done with your analysis. If you don’t want to create a whole new database you can create a new table in an existing database. The advantages of saving to a table are that you can use native SQL tools to do your analysis or even Excel. For this demo this is the method we will use.
a. When you select this option you will be prompted to connect to a SQL instance of your choosing. Select the server you’ll be doing your trace on.
b. Here you can name your new table (creates table for you, assuming you have permission to do so).

c. Your other option is to save to file. This will create a series of .TRC files wherever you specify. The advantage to using this option is that your results become portable in that you can move and import those files wherever you need them to do your analysis (i.e. copy them to your local PC and do analysis locally).

3. Configure your trace’s stop time. This is important as you want to make sure you have a consistent slice of time measured. This can later be modified within the script if you’d like.


4. At this point we can customize our trace. Click on the Events Selection tab. Here you can select the events and filters you’d like to trace on. Be careful as to not choose too many options/filters as this can bog down the trace and cause performance problems on the server itself since you’re trying to log so many things at once. For purposes of this demo I’ve chosen the Standard (default) template and default settings.

5. Run your trace…and then stop it immediately. This sounds a little strange but keep in mind we’re not running our trace right now, we just want the script that makes up this trace. You start the trace by clicking the Run button at the previous screen.
Once the trace starts you stop it by clicking on the Stop button or by going to the File Menu and selecting Stop Trace.

6. Collect your trace script. Once you’ve stopped your trace go to the File menu, Export, Script Trace Definition, select For SQL Server 2005-2008. Select a location to save your script (.SQL) file.

7. To see your script, open it up in SSMS. In the script you’ll see all the options you chose in the Profiler GUI. The @DateTime variable is the option for when to stop your trace so modify that as needed.

8. Now to schedule your newly created script. In SSMS connect to the server you want to trace on. Go to your SQL Server Agent and expand it so you can see the Jobs folder. Right-click the Jobs folder and select New Job.

9. In the New Job Step dialog, click on the Open button. Browse to where you saved your trace script file, select it and click Open. It might prompt you twice, just repeat. Once you’ve loaded it you should see the contents of your script file in the Command window. NOTE: At this point you can also choose what account to run this script as by selecting an account from the dropdown menu under Run as. Click OK when you’re done.

10. Next we need to schedule your trace. Click on the Schedules link on the side menu. You can pick an existing schedule or create a new one. Here you’ll want to create a New schedule. Give your schedule an easily identifiable name. Since we’re creating a custom schedule you can do a one-time job or you can choose to run this on a recurring schedule (i.e. once a month). The recurring schedule would be advantageous if you’re looking to monitor your SQL performance on a regular basis and want to make sure you trace the same actions every time. One thing to note is that you want to set your start time here under the ‘Occurs once at’ section. Remember, you’ve already scheduled your stop time for the trace within your script. Once you’re done customizing your schedule click OK when you’re ready to proceed.

11. Click OK to finish creating your new job. To see your newly created job look under the Jobs folder in SQL Server Agent. Congratulations, you’ve now created an automated server-side trace using SQL Server Profiler!


What is Navratri?

Navratri, is a festival of worship and dance. The word Navaratri literally means nine nights in
Sanskrit; The festival is celebrated for nine nights every year during September or October based on
Hindu calander.
There are many legends attached to the conception of Navratri like all Indian festivals but all of them
are related to Goddess Shakti (Hindu Mother Goddess) and her various forms. Navratri is divided
into three-day sets, each devoted to a different aspect of the supreme goddess. The first three days are
devoted to Goddess Durga (Warrior Goddess to destroy all our vices, impurities, and defects) dresses
in red and mounted on a lion. The next three day set is devoted to Goddess Lakshmi (the giver of
spiritual and material wealth) dressed in gold and mounted on an owl, and the last set is devoted to
Goddess Saraswati (the goddess of wisdom) dressed in milky white and mounted on a pure white
swan. In some communities people undergo rigorous fasts during this season that lasts for the nine
days of the festival, only to be opened on the tenth day of Dussehra. Traditionally, Navratri was
celebrated by Hindu women only, in the honor of goddess Amba/Durga. Amba/Durga is believed to
be a Shakti, originating from Lord Shankara.
On the tenth day of Navratri, the holiday of Dussehra, an effigy of Ravana is burnt to celebrate the
victory of good (Rama) over evil.


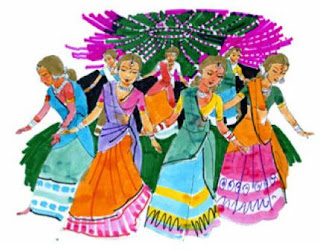
During this colorful event of Navratri, young men and women dance around an earthen lamp,
representing Goddess Durga, kept in a decorated mud jar called Garba, singing songs accompanied
by the rhythmic clapping of hands – an expression of gratitude towards goddess Durga for saving the
world from the atrocities of the Mahishasur.
Though it is one of the most celebrated festivals of Hindu calendar, it holds special significance for
Gujaratis and Bengalis and one can see it in the zeal and fervor of the people with which they indulge
in the festive activities of the season.


Garba
The name Garba comes from the Sanskrit term Garbha Deep. Garbha, when translated, most closely
resembles the English preposition inside, and Deep is a small earthenware lamp.
Garba is a dance that originated in the Gujarat region. Traditionally, either the lamp (the Garba
Deep), or an image of Amba is placed in the middle of the concentric rings. People dance around the
deity clapping rhythmically. At every step they gracefully bend sideways, the arms coming together
in beautiful sweeping gestures, up and down, left and right, each movement ending in clap. The songs
of the Garba are often historic and melodious and have been handed down through generations. The
origins of them seem to be a tribal dance revolving around a hunt; later it was transformed into an
agricultural ritual dedicated to the goddess Ambika. Today in the cities and town the dance is a social
activity and entertainment rather than religious agricultural or fertility symbol. People clad in
chaniya-cholis and dhoti-kurtas dancing in a synchronized manner. There are variations in the garba
in different regions and communities. Dancers have involved their own style and steps.
The Garba of Gujarat is the most popular women's folk dance of Gujarat. During Navratri, a pot is
ceremoniously placed attractive designs are made on the pot and a light is placed inside. Village girls
bearing pots (garbis) on their heads go from door to door and dance around the respective house.
Dandiya
Although Dandiya Raas is also somewhat associated with garba, it is originating from a totally
different root. The origin of the Rasa is traced back to the legends connected with the life of Lord
Krishna. It is essentially associated with the agricultural rites. Dandiya raas was traditionally
performed by men only. Traditionally, this was a pseudo practice of the sword fight with footwork,
you can call it as in poomse in Tae Kwon Do or Kata in Karate. You will still find these traditional
movements and forms of Dandiya raas in Saurashtra (Western Gujarat). This was an excellent social
tradition of incorporating goddess with an art of swords and also with entertainment, when there were
many invasions happening on small kingdoms and almost every man in society was responsible for
his region's and community's safety. The Rasa dances of Saurashtra are closely related to agricultural
functions and are for the best part grain-ritual dances.
Dandiya Raas is performed in groups of pairs, with a pair of sticks in their hands played to the beat of
a dhol. These sticks, which can vary from 1.5 to 2 feet in length, and is meant to represent the sword
of the avenging Goddess Durga. The circles formed by men and women move in clockwise and anticlockwise
directions. Raas is a very energetic, colorful and playful dance providing an opportunity
for acting and exchanging messages through eye contact. The most impressive artistry of the Rasa
dances of Gujarat and Saurashtra is displayed in the Dandiya Rasa by men. It is a counterpart of the
Garba of the women. The dancers use sticks at the end of which tiny bells (ghungrus) are tied so that
they give off a clear jingling sound when they strike one another. This dance has a very complicated
rhythm pattern and even though the dancers begin in a slow tempo, the dance develops in such
manner that each person in the circle not only performs a solo dance with his own sticks, but also has
a complex multiple relationship with both his partners on either side as also partners opposite him in
the circles. The circle keeps breaking sometimes into two concentric circles and sometimes into three
or four circles within the orbit of a larger circle.
Garba and Dandiya Raas are now amongst the dances representative of India and have been seen in
several world cultural festivals. One of the most important factor of the Garba/ Dandiya Raas is the
quality of singers. Today there are famous choral groups like Falguni Phatak, Babla, Adesh
Srivastava, Preeti-Pinki group, Vijay Shah are some of the favorite Dandiya Raas singers. There are
also training academies at which you are taught many different styles/steps like Dodhiyu, simple five,
simple seven, popatiyu, Trikoniya (hand movement which forms an imagery triangle), Lehree, three
claps, butterfly, hudo, two claps and many more.


Dandiya Choice
Traditionally Dandiyas were bamboo sticks about a feet in length. Today, Dandiyas come in
numerous size, color and style. The revolving dandiyas are the metallic ones with a socket and ball
bearing in the center, to give a good effect when the stick goes whirling in the air. Acrylic dandiyas
are colorful, light and attractive. Among wooden ones, there are a wide range of stick to choose from
– from ones with tiny bells and trinkets to those with silk or fabric coatings. The wooden dandiyas
give a definitive sound of clashing sticks
Ahmedabad and Vadodara are two of many great places to enjoy Navratri. All kinds of Rasa-Garbas,
Dandia ras etc. are practiced in this period, feasting and fasting are important cultural aspects of this
day, and various rituals are performed at temples. The atmosphere is electric and revelry is in the air.
Dabeli is far the most popular snack that most dandiya revelers consume during the Navratri in many
parts of India.


Categories
Duha: Is in opening fast tracked song, at a very high pitch and after that the 'geet' follows! Men
display an energetic form of dance synonymous with the tunes.
Raas: It's roots lay from the days of Lord Krishna who played 'raas' on the shores of Yamuna river on
a moonlit night with his beloved Gopis. The tradition still continues! nowadays, men and women play
in pairs with bamboo sticks called 'dandiya'!
Garba: Is a very graceful form of dance among the Gujaratis and it is performed on 9 nights,
'Navratri' to Goddess Ambica, where women dance gracefully in circles sometimes also using, 'Bedu,
Kanjari' or just 'Taali' and 'Chapti' They are dressed in exquisitely embroidered, set in mirrors 'Choli',
'Ghagra' and 'Bandhani' dupattas, silver oxidized jewellery where in 'Tika' and 'Anklets' are a must!
the dress code of men is Kehediyu, Chudidar and a Turban.
Aarti: Is sung in the beginning genuflecting the Goddess. Prayers are offered and Praises are sung and
danced with diyas in hand.